
I finished this quilt just before summer holidays and gifted it right away. I am not sure if I measured it… I’ll see later (see below). As I was taking the pictures I was thinking how simple block can have a wonderfully complex effect. So I thought I would write a little tutorial. It shows the exact dimensions and the number of blocks I used to make this quilt. I think this would be perfectly suitable even for a quilting novice. Here we go…
On Friday, I sat down to make a quick outline of the tutorial, thinking I would make up the illustrations in Illustrator or Inkscape (a free software similar to Illustrator that I like; the problem with it is that you cannot find quite so many tutorials for it online, and once you go pass the basic skills, you can get stuck; that said I did use it to create all of the drawings and patterns for my now forgotten project flekka-challenge). As I was sketching, I was fretting about how long it will take me to do it all over, and maybe I could just leave as a sketch (the problem with this approach is when you make a mistake and find it at the very end… oh well, live an learn). Similar to all those instructions in Japanese sewing books. They are perfectly clear. When they are written well, of course. So here you are – a handwritten tutorial. I would like to know what you think…
Note to self – use a marker next time, pencil does not scan (or photograph) well.
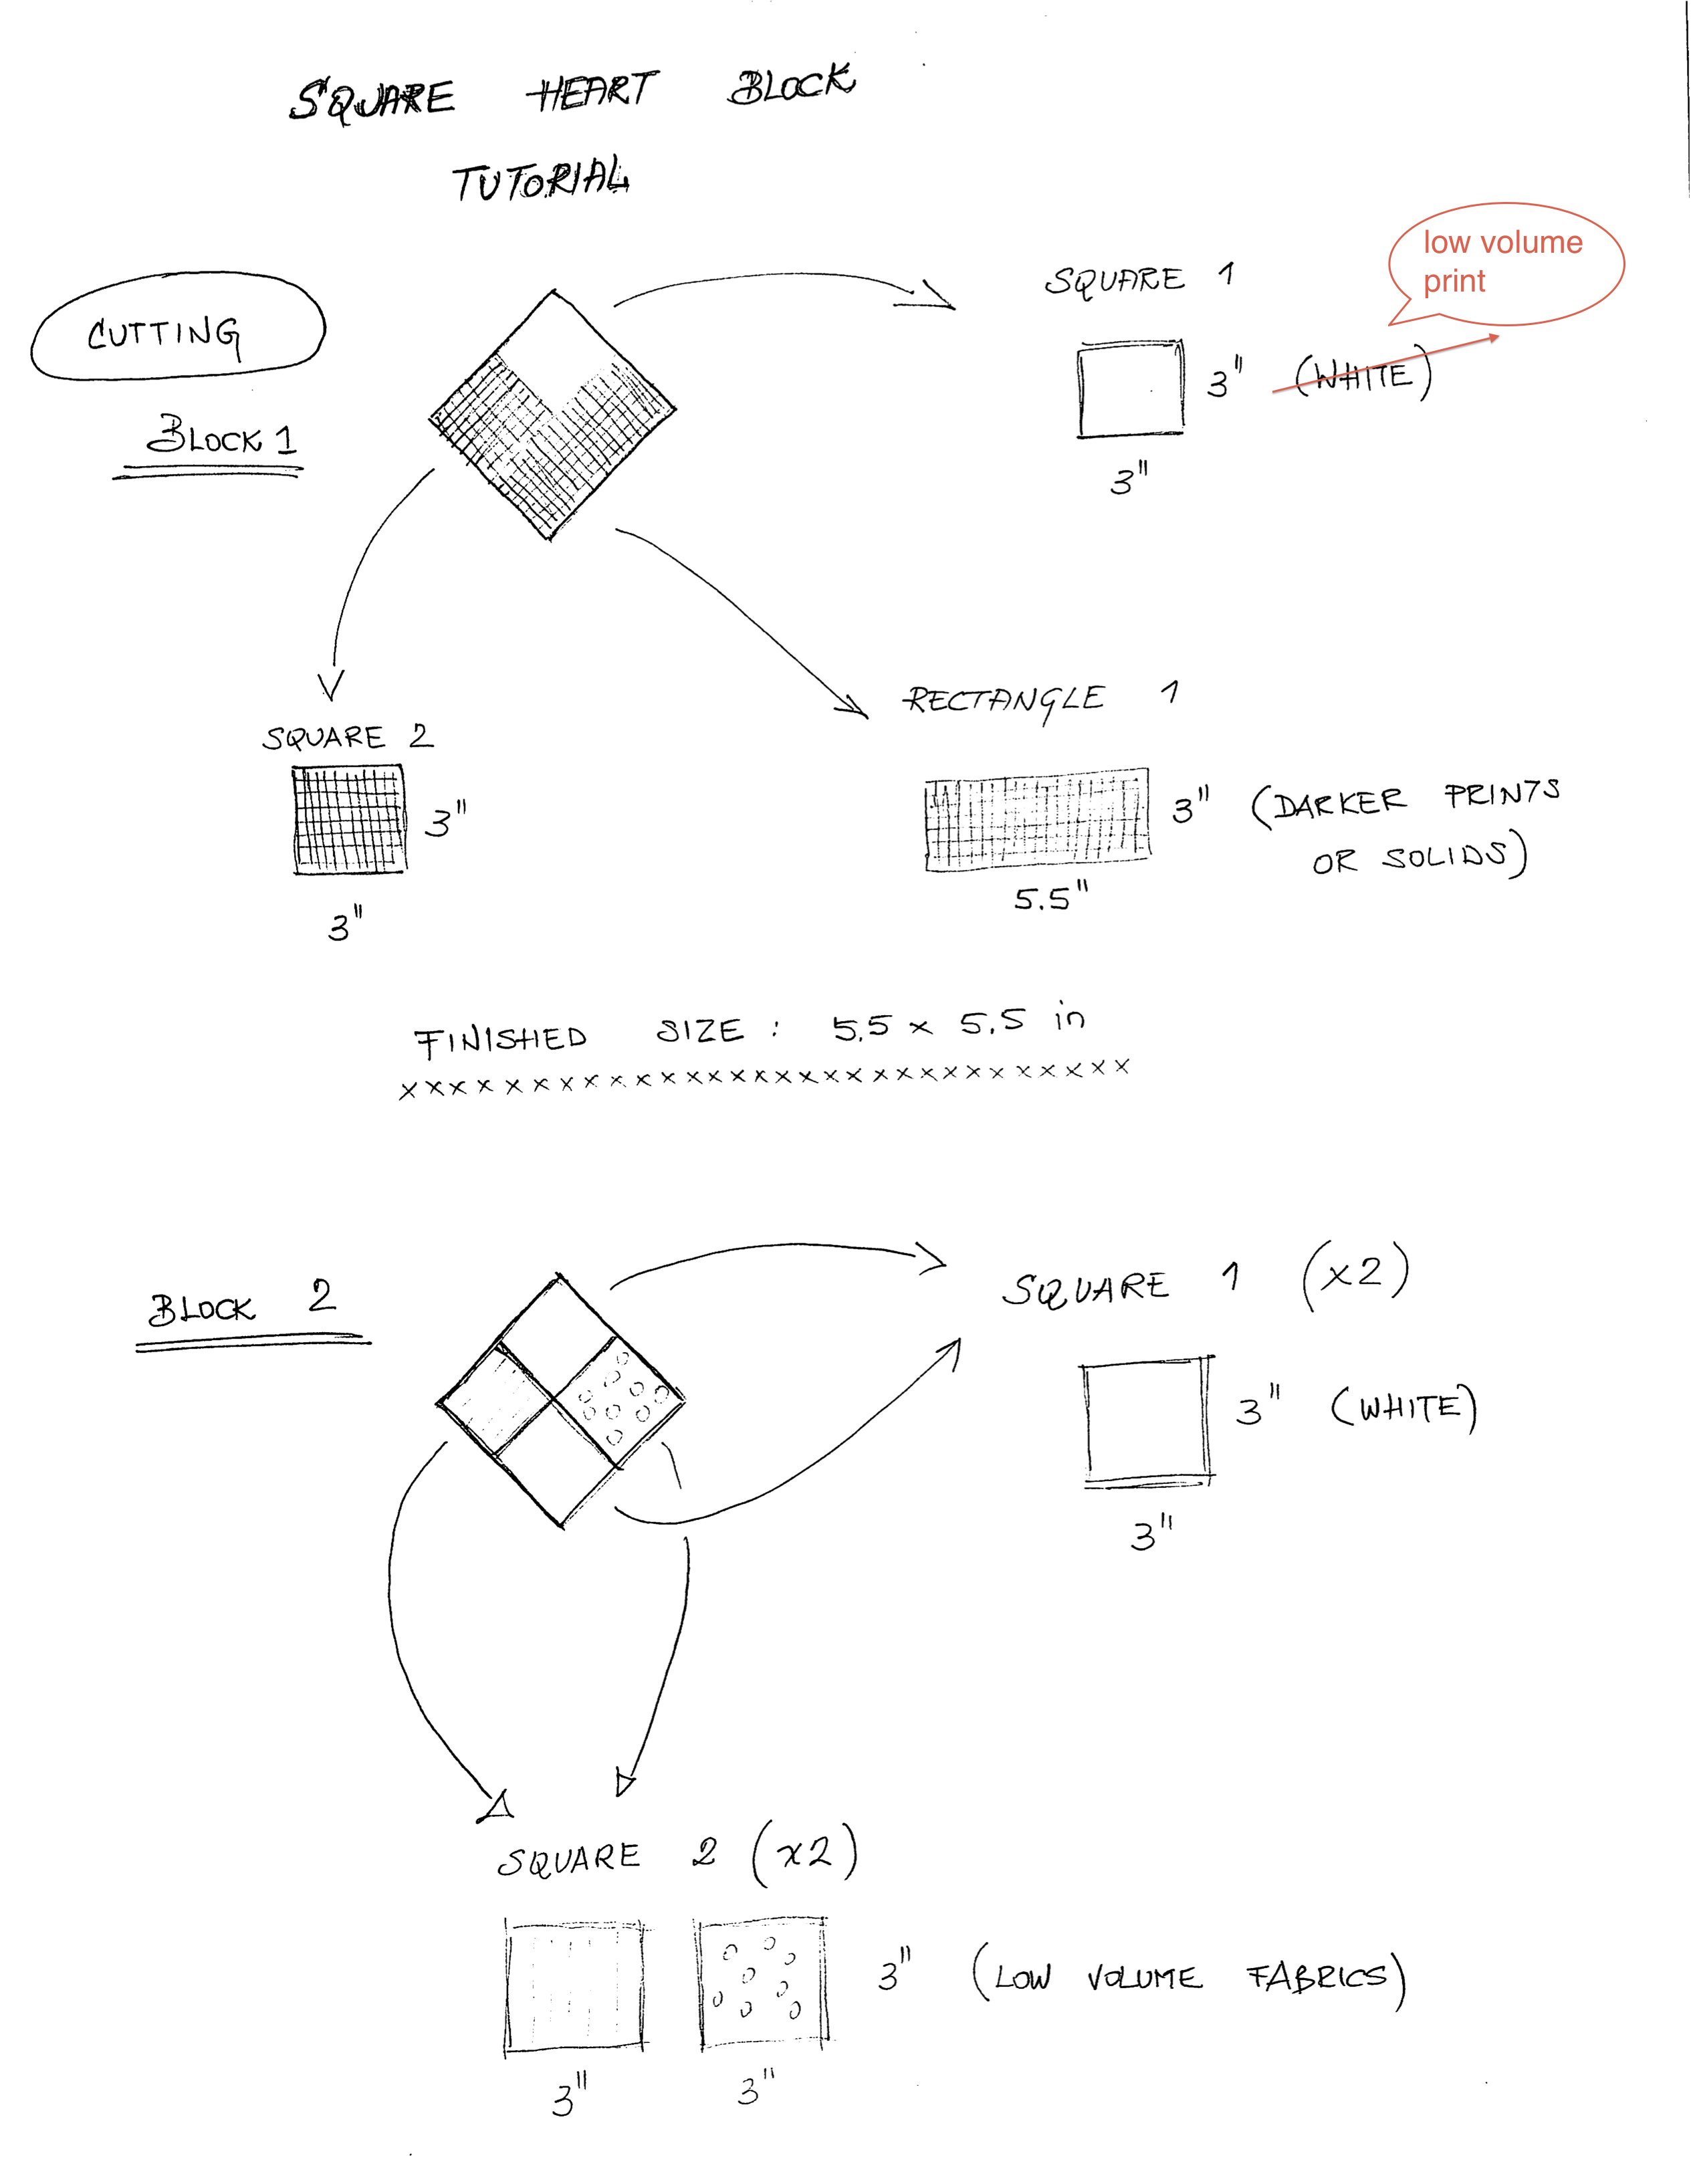
This quilt top consists of two different square blocks. The first block is what I call the square hearts block. For each block you will need to cut two 3×3 in squares, one white in low volume print and one in a darker print or solid; and one rectangle 5.5 in long and 3 in wide. The second block is a simple four-patch: 2 white and 2 low volume squares 3×3 in. This will give you finished squares 5.5×5.5 in.
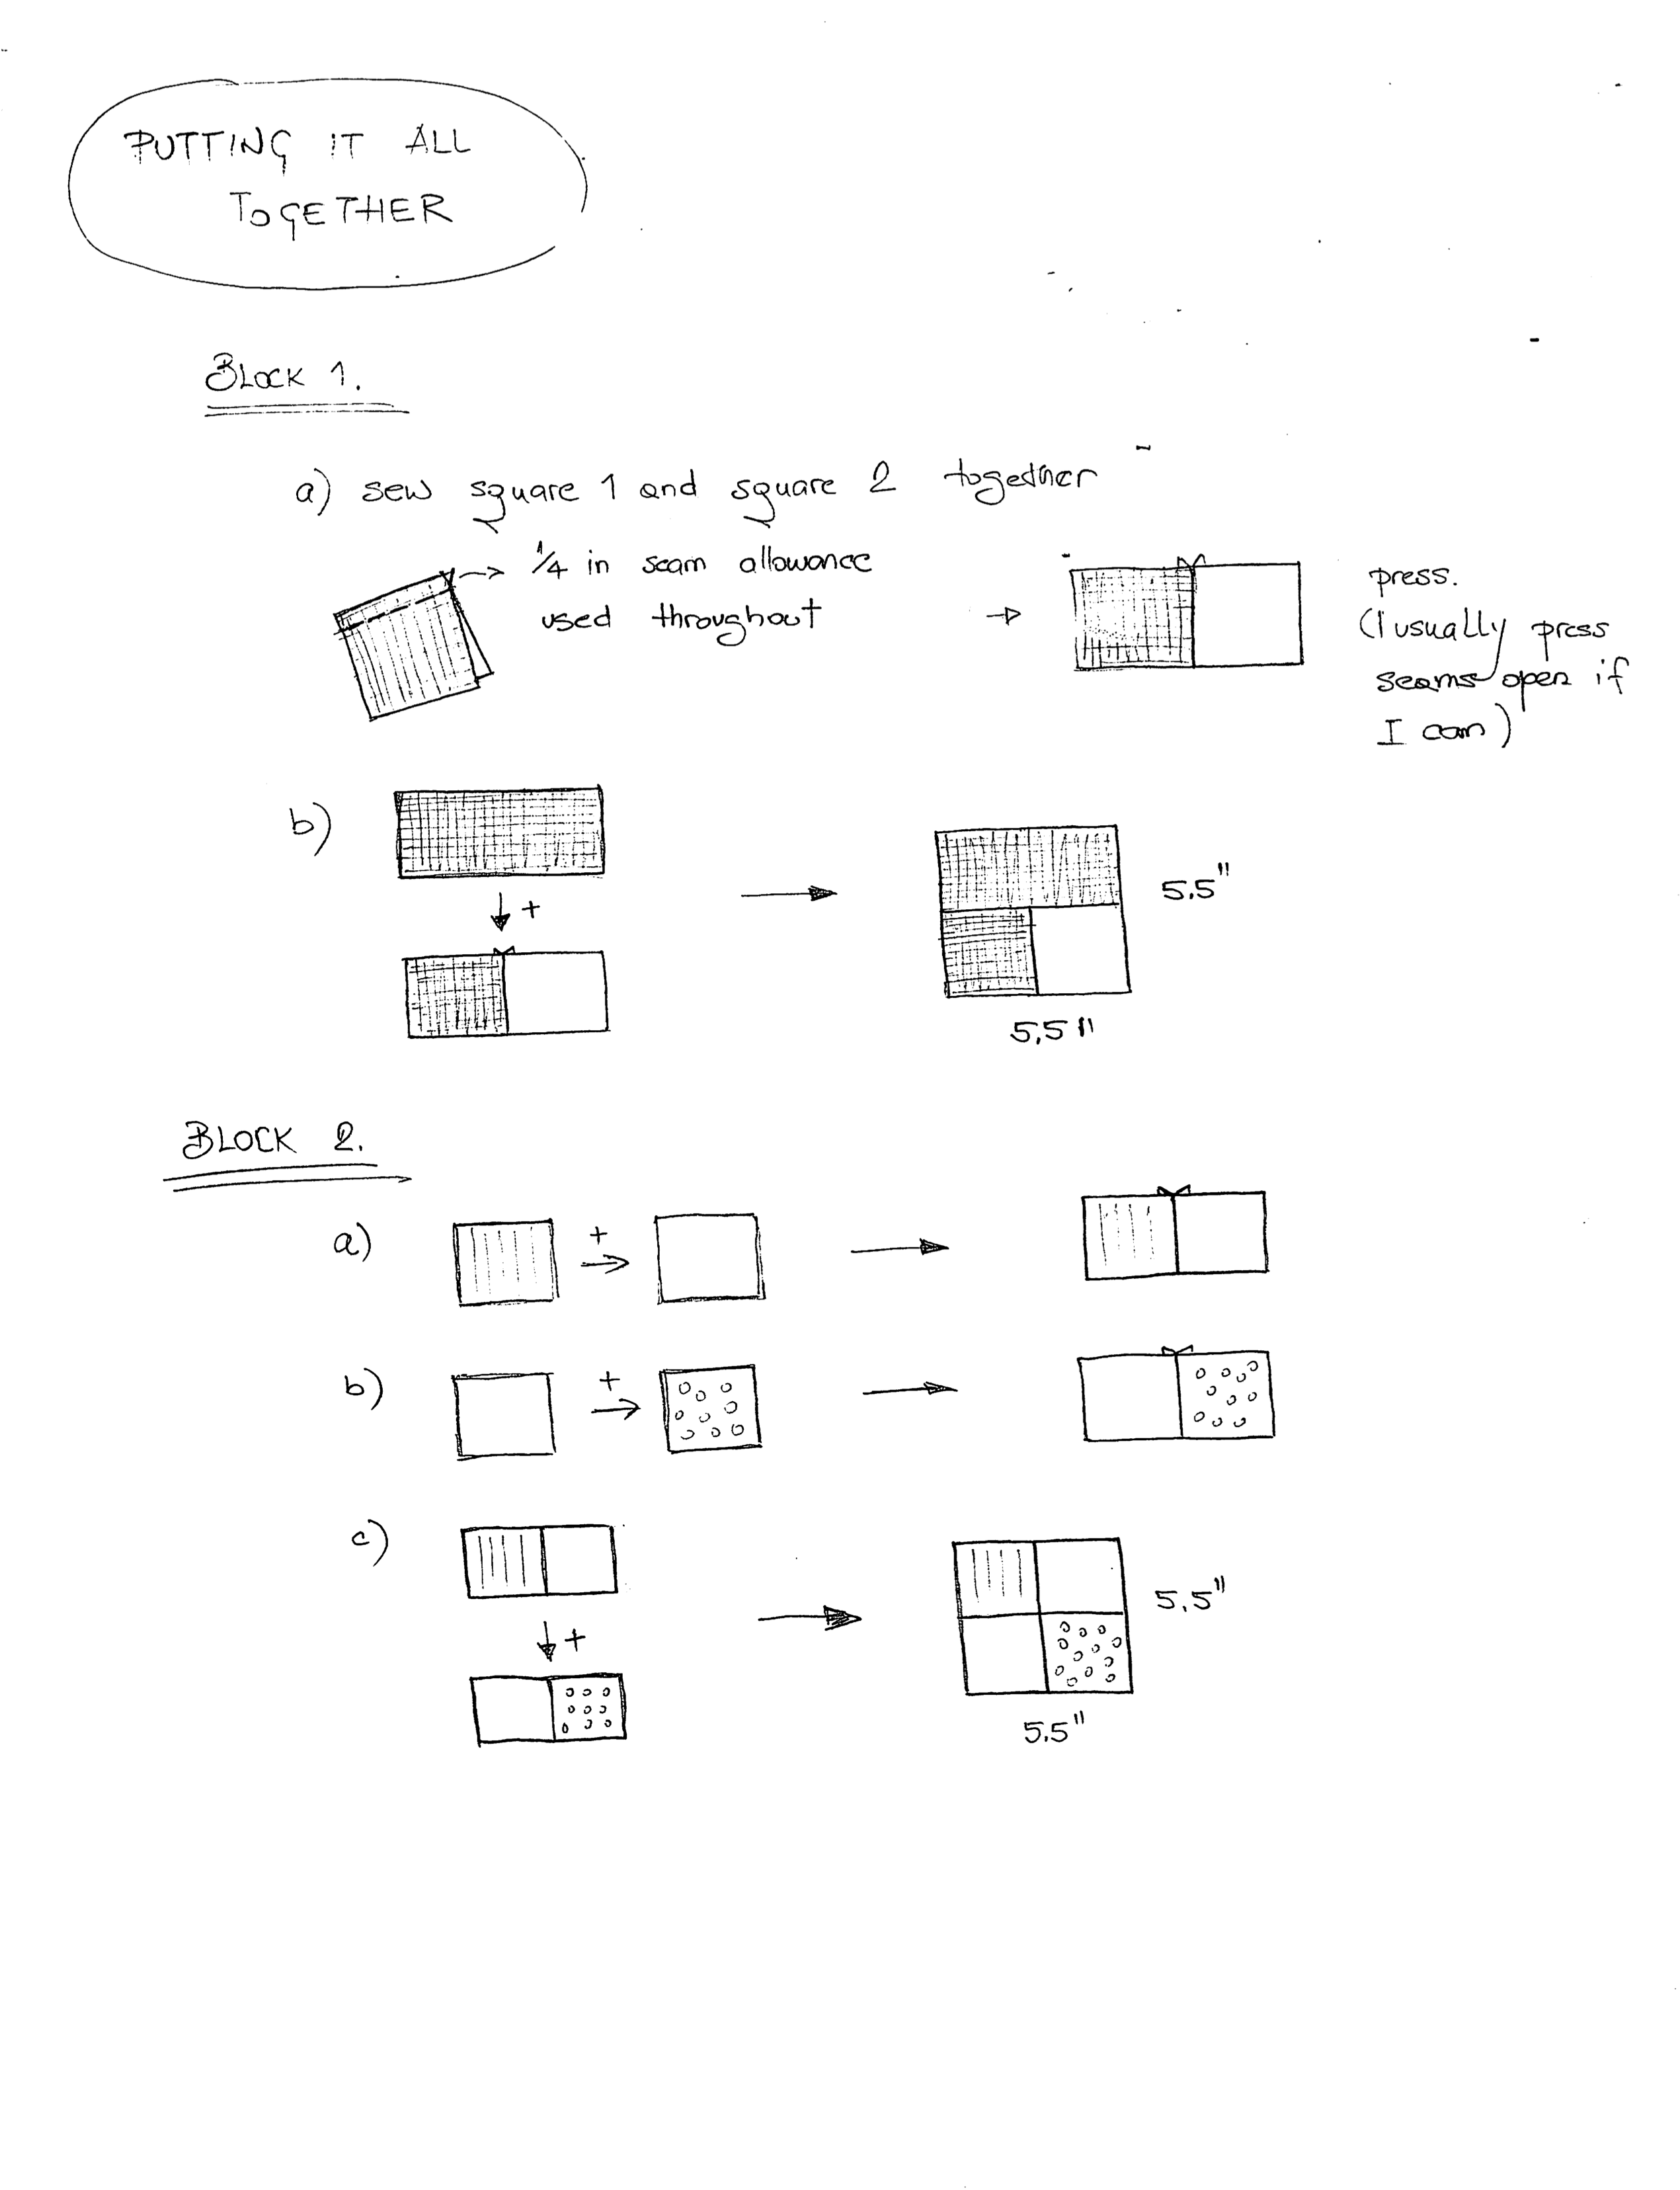
This shows you how to assemble blocks. I hope it is clear enough we need no words…
For my quilt I made 63 square hearts blocks, and 48 four patch low volume blocks. I looked in my original post and I was right, I did not measure the quilt before it was gone, but I managed to calculate from the picture – it was about 50 x 64 in.
Before I forget, you will NEED ONE MORE THING that is not in these sketches… the white triangles that go around the edges of the quilt. You need 28 triangles, but all you have to do is cut 14 6×6 in squares. I cut them a bit larger (remember the finished size of the squares – before assembly into quilt top – 5.5×5.5 in) for the seam allowances around the edges. (alternately, you could cut 28 white squares, and then trim them down at the end, after you assemble the quilt top).
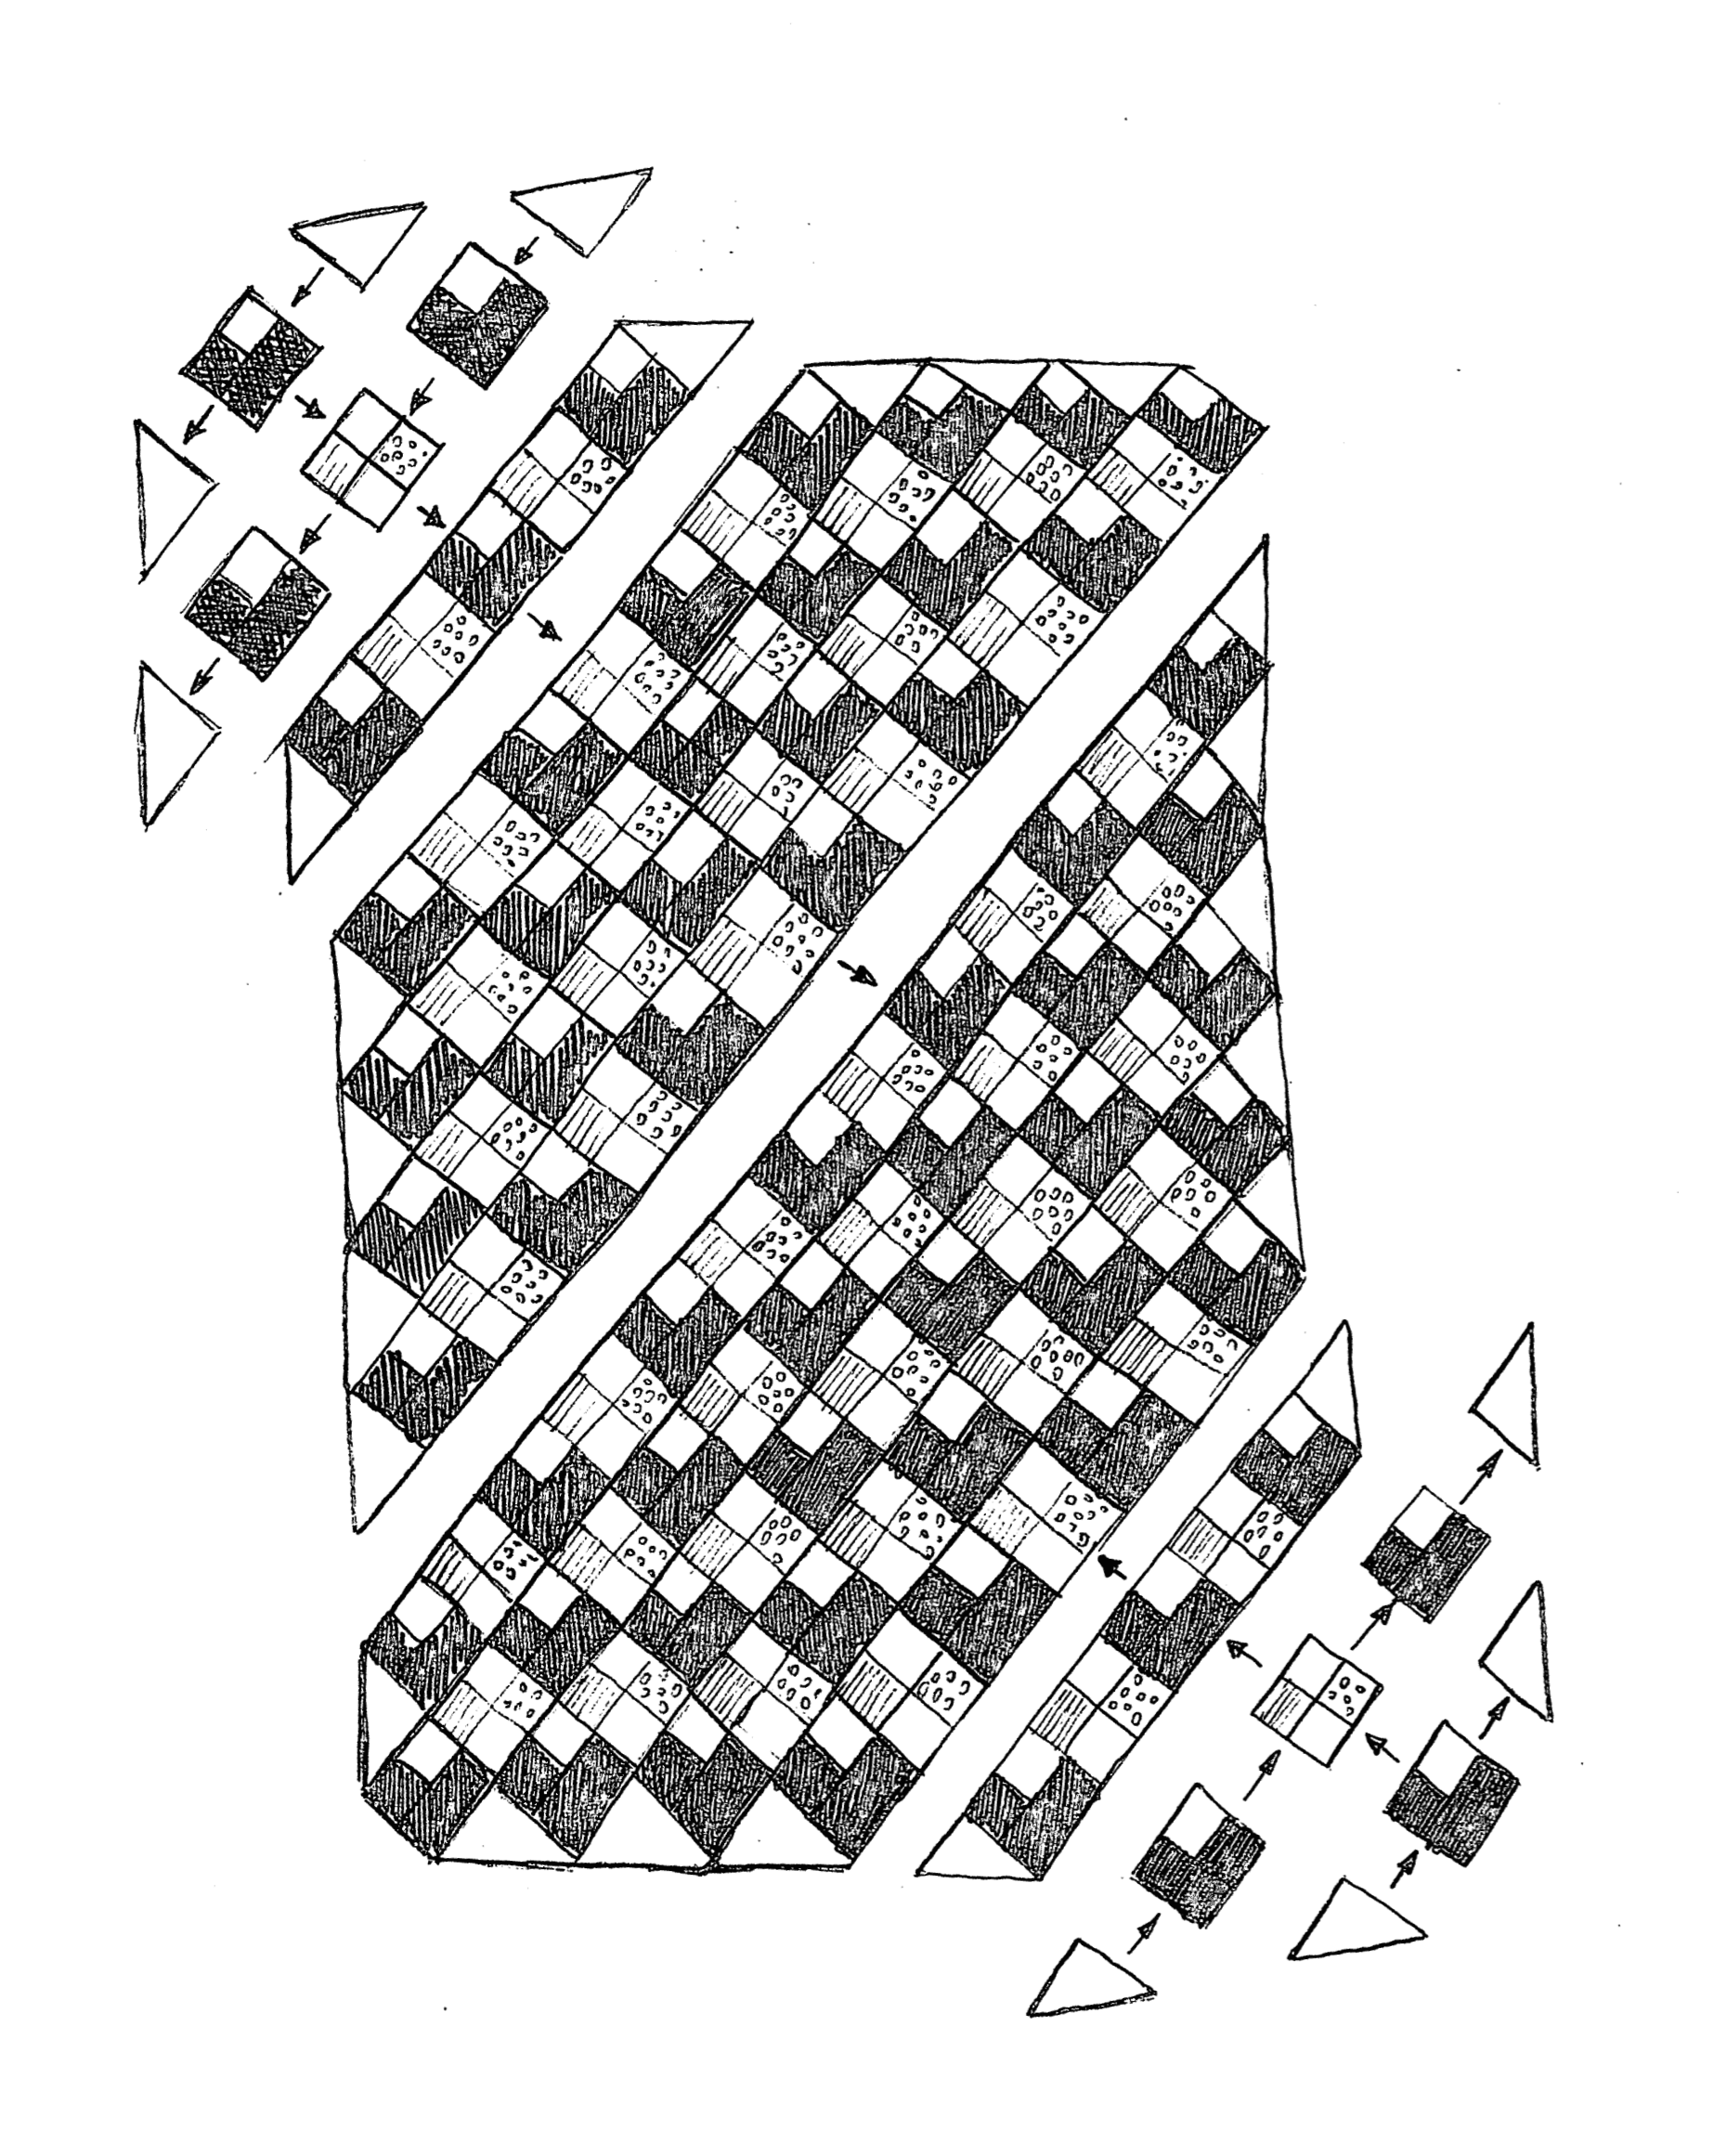
And finally this is how you assemble all the squares and the edge triangles together. The squares are on point, so instead of sewing together rows or columns, you start on a diagonal, as shown above. One trick I do, especially with larger quilts, is that I do one half of the quilt starting from one corner, then the other half starting from the opposite corner, and then I join the two halves together at the end. That was you never have more than one half of the top sitting in your lap.
